Deploying Ollama with Open WebUI Locally: A Step-by-Step Guide
Deploy Ollama with Open WebUI locally via Docker Compose — run open-source language models on your own hardware for privacy and cost savings.
I run LLMs on my own machine for two reasons: my prompts never leave my hardware, and I can experiment all day without watching an API meter. The setup used to be the hard part. Wrangling Python environments, CUDA drivers, and model weights by hand was enough friction that most people quit before the first token.
Ollama removes most of that friction, and Open WebUI puts a ChatGPT-style interface on top of it. The pair runs cleanly in Docker, works offline once the models are downloaded, and the whole stack comes up with a single compose file.
What we’ll cover
- Two ways to run Ollama with Open WebUI locally: Docker Compose (the one I use) and a manual install
- Pulling and managing open-source models like Llama 3 and Mistral
- Customizing model behavior with a Modelfile
- The failures you’re most likely to hit, and their fixes
- Hardware sizing, security notes, and calling the Ollama API from your own code
Hardware Requirements
Before starting, ensure your system meets these minimum requirements:
- CPU: 4+ cores (8+ recommended for larger models)
- RAM: 8GB minimum (16GB+ recommended, more better.)
- Storage: 10GB+ free space (models can range from 4GB to 50GB depending on size)
- GPU: Optional but recommended for faster inference (NVIDIA with CUDA support)
Understanding Ollama and Open WebUI
What is Ollama?
Ollama is a lightweight tool designed to simplify the deployment of large language models on local machines. It provides a user-friendly way to run, manage, and interact with open-source models like LLaMA, Mistral, and others without dealing with complex configurations.
Key Features:
- A CLI and an HTTP API, so you can drive it from a terminal or from code
- Support for multiple open-source models
- Easy model installation and management
- Optimized for running on consumer hardware
- Built-in parameter customization (temperature, context length, etc.)
Official Repository: Ollama GitHub
What is Open WebUI?
Open WebUI is an intuitive, browser-based interface for interacting with language models. It serves as the front-end to Ollama’s backend, providing a user-friendly experience similar to commercial AI platforms.
Key Features:
- Clean, ChatGPT-like user interface
- Model management capabilities
- Conversation history tracking
- Customizable system prompts
- Model parameter adjustments
- Visual response streaming
Official Repository: Open WebUI GitHub
Step-by-Step Implementation
Method 1: Using Docker Compose (Recommended)
Docker Compose offers the simplest way to deploy both Ollama and Open WebUI, especially for beginners. This method requires minimal configuration and works across different operating systems.
Prerequisites
Before starting, ensure you have:
- Docker1 installed and running
- Docker Compose installed (often bundled with Docker Desktop)
- Terminal or command prompt access
Step 1: Create a Project Directory
First, create a dedicated directory for our project:
mkdir ollama-webui && cd ollama-webuiStep 2: Create the Docker Compose File
Create a file named docker-compose.yml with the following content:
version: '3.8'
services:  ollama:    image: ollama/ollama:latest    container_name: ollama    ports:      - "11434:11434" # Ollama API port    volumes:      - ollama_data:/root/.ollama    restart: unless-stopped
  open-webui:    image: ghcr.io/open-webui/open-webui:main    container_name: open-webui    ports:      - "3000:8080" # Open Web UI port    environment:      - OLLAMA_API_BASE_URL=http://ollama:11434    depends_on:      - ollama    restart: unless-stopped
volumes: ollama_data:Step 3: Start the Services
From your project directory, run:
docker-compose up -dThis command starts both services in detached mode (running in the background). The first time you run this, Docker will download the necessary images, which might take a few minutes depending on your internet connection.
Step 4: Access Open WebUI
Once the containers are running:
- Open your web browser
- Navigate to http://localhost:3000
You’ll see the Open WebUI landing page and signup screen:

Step 5: Create an Account and Pull a Model
After creating an account, you’ll need to pull a language model. The interface will look like this:

When you select a model to download, you’ll see a progress indicator:

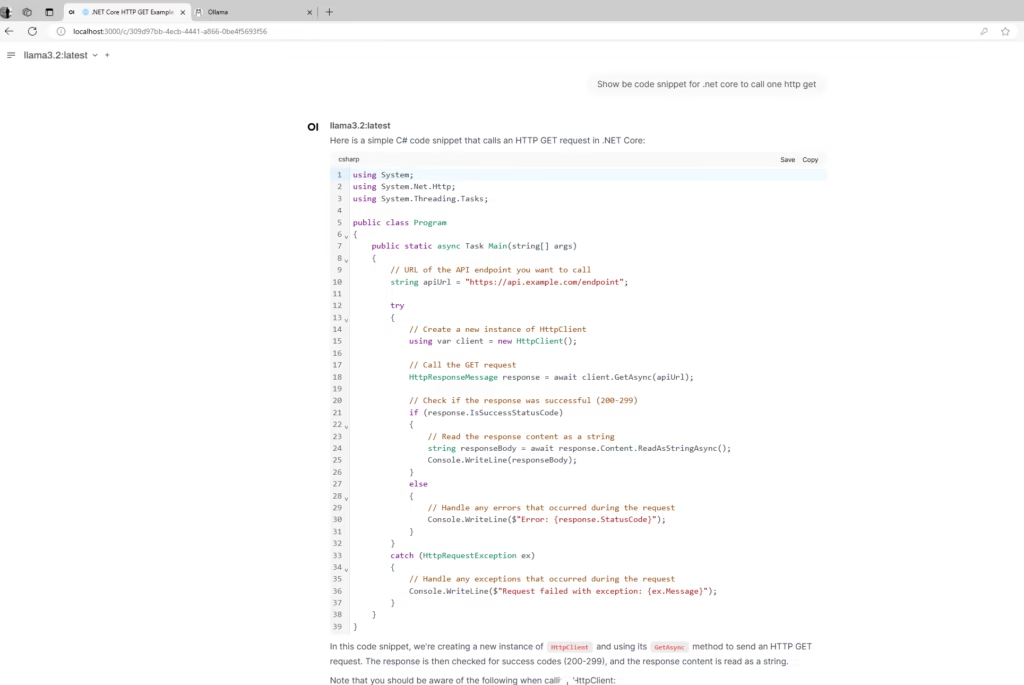
Once the model is downloaded, you can start chatting:
Method 2: Manual Setup
For users who prefer more control over the installation or cannot use Docker, this method provides step-by-step instructions for setting up Ollama and Open WebUI separately.
Prerequisites
Ensure you have:
Step 1: Install Ollama
-
Download Ollama for your operating system:
-
Complete the installation by following the installer instructions
-
Open a terminal or command prompt and verify the installation:
Terminal window ollama --version -
Pull a model to test your installation:
Terminal window ollama pull mistral
Step 2: Install and Run Open WebUI
-
Clone the Open WebUI repository:
Terminal window git clone https://github.com/open-webui/open-webui.git -
Navigate to the project directory:
Terminal window cd open-webui -
Install Open WebUI using pip:
Terminal window pip install open-webui -
Start the server:
Terminal window open-webui serve -
Access the interface in your browser at http://localhost:3000
Working with Models
Available Models
Ollama supports a variety of open-source models. Here are some popular ones to try:
| Model | Size | Best For | Sample Command |
|---|---|---|---|
| Llama3 | 8B | General purpose, instruction following | ollama pull llama3 |
| Mistral | 7B | Balanced performance and size | ollama pull mistral |
| Gemma | 7B | Google’s lightweight model | ollama pull gemma |
| Phi-2 | 2.7B | Efficient for basic tasks | ollama pull phi |
| CodeLlama | 7B/13B | Programming and code generation | ollama pull codellama |
Pulling Models
You can pull models either through the Open WebUI interface or using the Ollama CLI:
Using Open WebUI:
- Navigate to the “Models” section
- Search for the model you want
- Click “Download” or “Pull”
Using Ollama CLI:
ollama pull mistralCreating Custom Models
You can customize existing models with specific instructions using a Modelfile. This is especially useful for creating assistants with specialized knowledge or behavior.
-
Create a file named
Modelfile(no extension):FROM llama3SYSTEM "You are an AI assistant specializing in JavaScript programming. Provide code examples when asked." -
Create your custom model:
Terminal window ollama create js-assistant -f Modelfile -
Run your custom model:
Terminal window ollama run js-assistant
Troubleshooting Common Issues
Docker-Related Problems
-
Issue: Docker containers won’t start
Solution: Ensure Docker Desktop is running and has sufficient resources allocated -
Issue: “port is already allocated” error
Solution: Change the port mappings in docker-compose.yml or stop services using ports 11434 or 3000
Model-Related Problems
-
Issue: Model download fails
Solution: Check your internet connection and try again; verify you have enough disk space -
Issue: Out of memory errors
Solution: Try a smaller model or increase Docker’s memory allocation (in Docker Desktop settings) -
Issue: Slow model responses
Solution: Consider using a GPU for acceleration or switch to a smaller model
Interface Issues
-
Issue: Can’t connect to Open WebUI
Solution: Verify both containers are running withdocker container lsand check logs withdocker logs open-webui -
Issue: Authentication problems
Solution: Reset your browser cache or try incognito mode; restart the container if needed
Best Practices for Local LLM Deployment
Performance Optimization
-
Allocate Sufficient Resources:
- Increase Docker memory limits for better performance
- If using NVIDIA GPU, enable CUDA support
-
Choose the Right Model Size:
- Smaller models (7B or less) for basic tasks and limited hardware
- Larger models (13B+) for more complex reasoning when hardware allows
-
Manage System Resources:
- Close resource-intensive applications when running models
- Monitor CPU, RAM, and GPU usage with system tools
Security Considerations
-
Local Network Exposure:
- By default, the services are only available on localhost
- Be cautious when exposing to your network (e.g., changing to
0.0.0.0:3000:8080)
-
Data Privacy:
- While data stays local, be mindful of what information you input
- No data is sent to external servers unless you configure external API usage
Advanced Use Cases
Integration with Other Applications
Ollama provides an API (port 11434) that you can use to integrate with custom applications:
import requests
def query_ollama(prompt, model="llama3"):    response = requests.post(        "http://localhost:11434/api/generate",        json={"model": model, "prompt": prompt}    )    return response.json()["response"]
result = query_ollama("Explain quantum computing in simple terms")print(result)
RAG (Retrieval-Augmented Generation)
You can enhance your models with local knowledge by implementing RAG:
- Use Open WebUI’s document upload feature
- Create embeddings from your documents
- Enable the model to reference these documents when answering questions
Where to go next
Pull a small model first (ollama pull llama3.2), confirm it answers in the WebUI, then swap in something larger once you know your hardware handles it. If you want this reachable from other devices on your network, put it behind a reverse proxy with auth rather than exposing the port directly. The Ollama model library is the fastest way to see what fits your memory budget before you commit to a download.
Further reading
- Ollama Documentation
- Open WebUI Documentation
- Docker Compose Documentation
- Large Language Model Basics
References
-
Node.js and npm — nodejs.org ↩
-
Python 3.7+ — python.org ↩
Comments
Comments are GitHub discussions. Sign in with GitHub to post; reactions need no account.