GitHub Codespaces: Streamlining Cloud-Based Development
A beginner-friendly guide to GitHub Codespaces that shows how to set up, configure, and use cloud-based development environments. Learn how to eliminate local setup headaches, work from any device, use Docker containers seamlessly, and leverage VS Code's full power in the browser.
Say goodbye to “It works on my machine” problems forever! GitHub Codespaces provides ready-to-code development environments in the cloud that work exactly the same for everyone on your team. This guide walks through everything you need to know to get started, even if you’ve never used cloud-based development environments before.
What is GitHub Codespaces?
GitHub Codespaces is a cloud-based development environment that runs a full Visual Studio Code instance in your browser. It gives you:
- Instant Development Environment: Start coding immediately without installing anything locally
- Consistent Setup: Everyone on your team uses identical environments
- Full VS Code Experience: Extensions, terminal, debugging - everything works just like local VS Code
- Pre-configured Containers: Use Docker without Docker Desktop installed on your machine
- Access from Anywhere: Code from any device with a browser, even tablets or less powerful computers
This article will help you understand how to set up, configure, and make the most of GitHub Codespaces, whether you’re a seasoned developer or just getting started.
Setting Up Your Codespace
1. Accessing Codespaces
There are two simple ways to launch a Codespace for your repository:
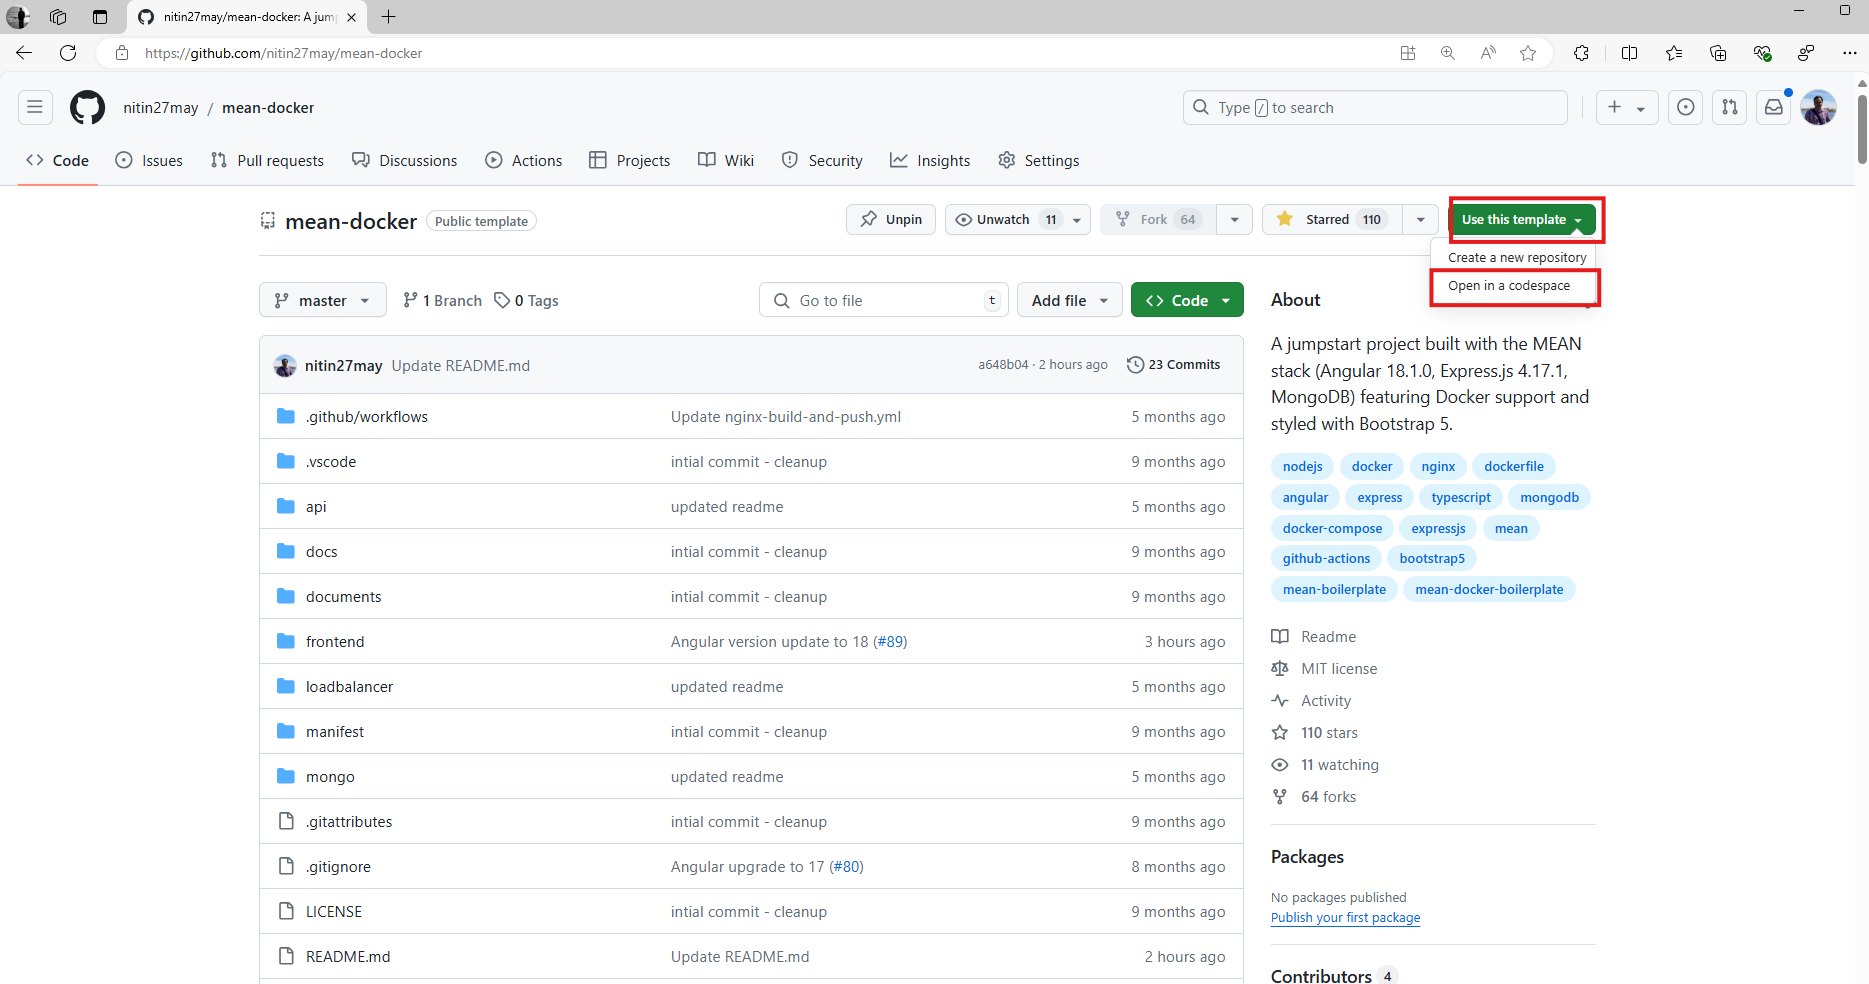
Method 1: From the repository page
- Navigate to your GitHub repository
- Click the green “Code” button (or “Use this template” for template repositories)
- Select the “Codespaces” tab in the dropdown
- Click “Create codespace on main” (or your default branch)
For example, I’ve used the repository below:
nitin27may/mean-docker: A jumpstart project built with the MEAN stack (Angular 18.1.0, Express.js 4.17.1, MongoDB) featuring Docker support and styled with Bootstrap 5. (github.com)
Method 2: Using the dropdown menu
- Go to your repository
- Click the “Code” dropdown
- Click “Create codespace on main” (or your default branch)
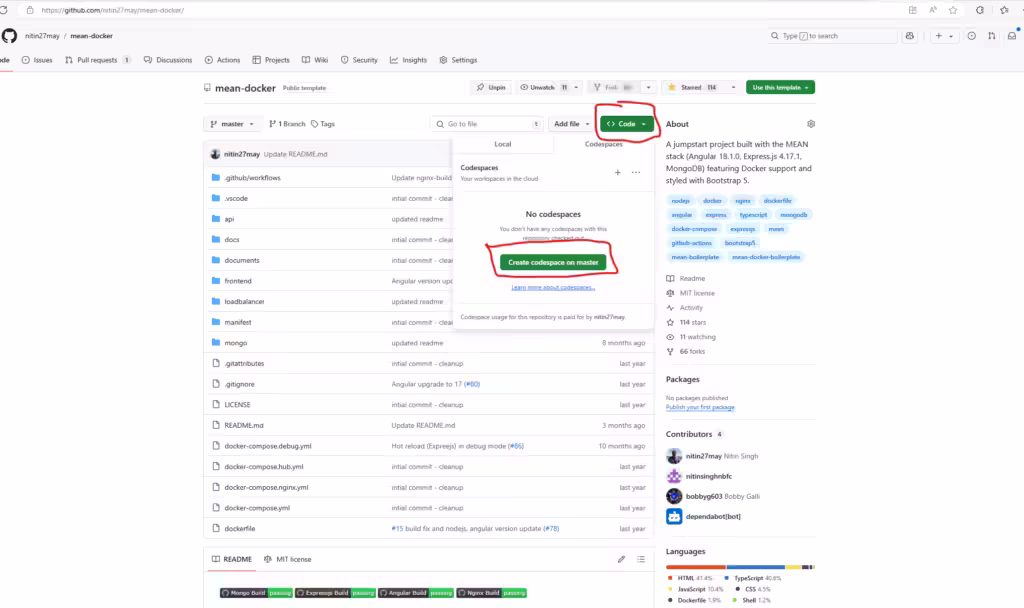
For first-time users: The first time you create a Codespace, GitHub will provision a virtual machine and set up the environment. This may take a few minutes, but subsequent launches will be much faster as GitHub caches your environment.
2. Understanding the Codespace Interface
Once your Codespace loads, you’ll see a familiar VS Code interface in your browser with several key components:
- Explorer: File browser on the left sidebar
- Source Control: Git integration
- Extensions: VS Code extensions that come pre-installed or can be added
- Terminal: Integrated Linux terminal at the bottom
- Editor: Main coding area in the center
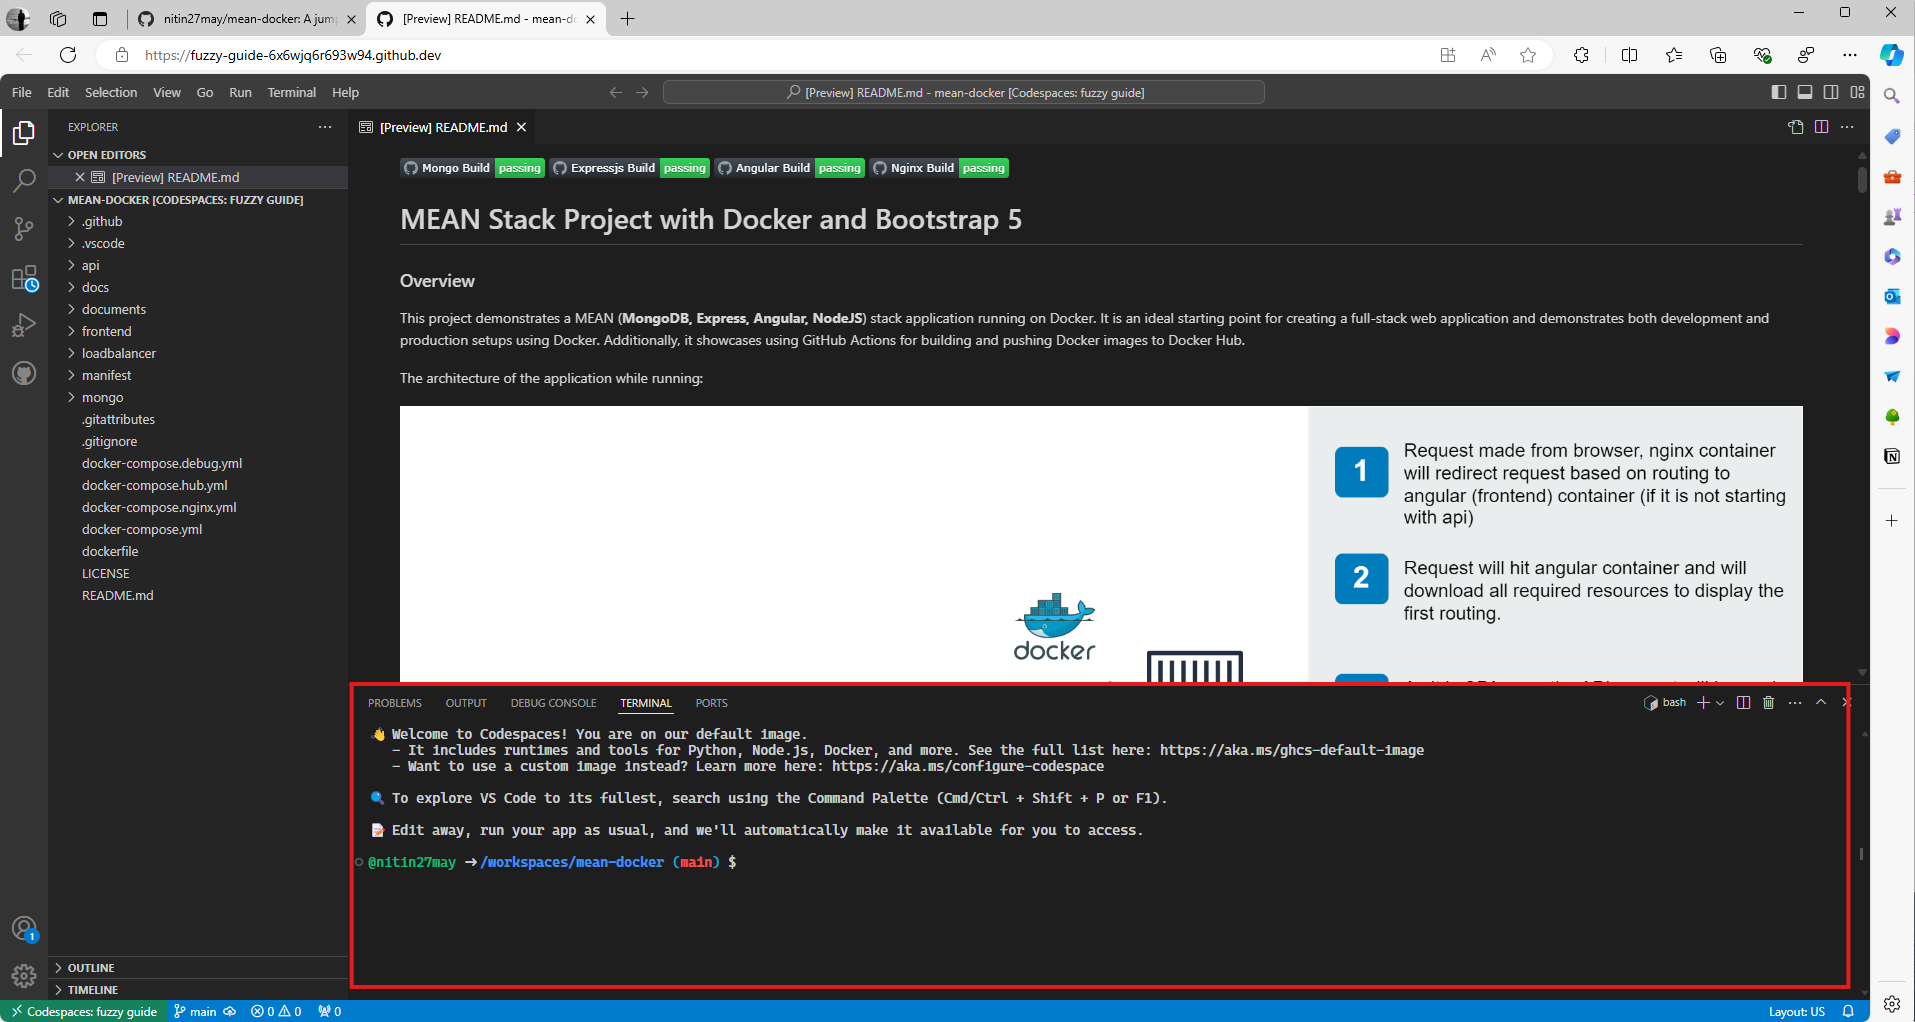
First-time tip: Take a moment to explore the interface. It works just like VS Code on your desktop, including keyboard shortcuts!
3. Configuring Your Development Environment
When your Codespace launches, you’re ready to start configuring your development environment:
- Terminal Access: Click on “Terminal” in the top menu, then “New Terminal” to open a command line interface
- Installing Dependencies: Run any setup commands like
npm installorpip install -r requirements.txt - Environment Variables: Set up environment variables using the VS Code interface or through configuration files
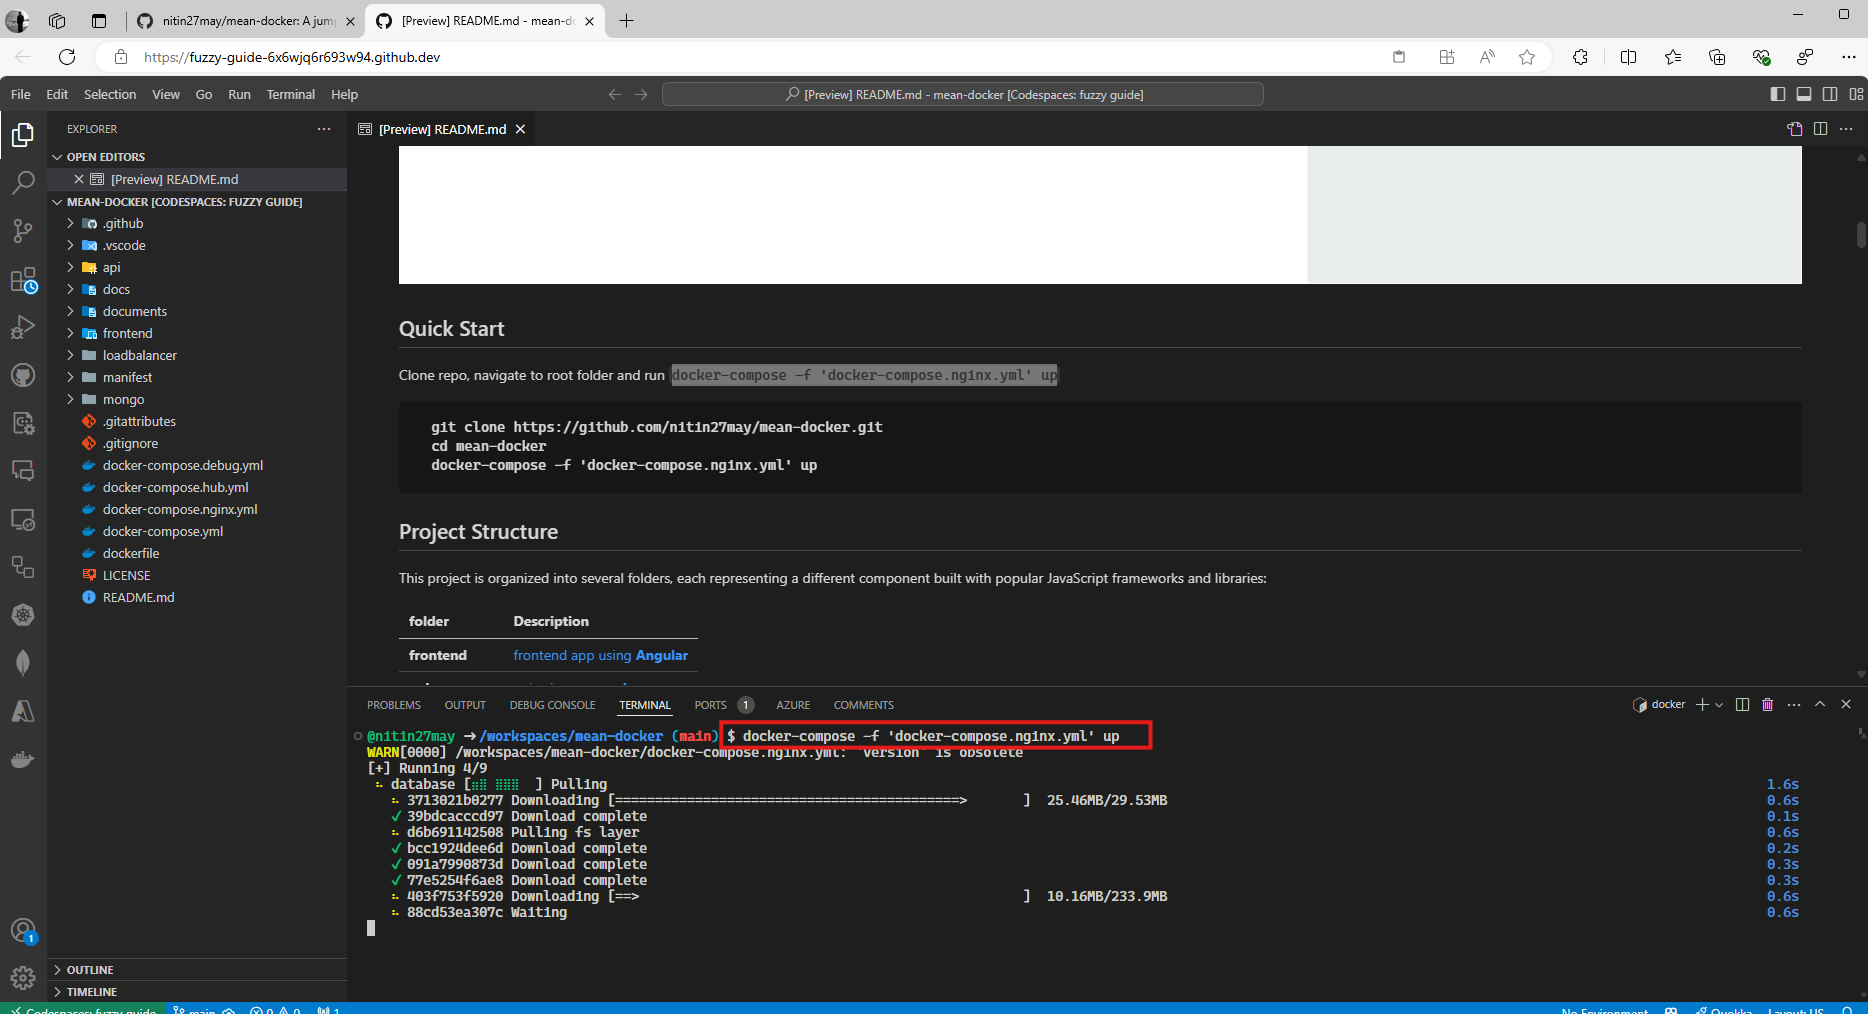
Working with Docker in Codespaces:
One of the most powerful features of Codespaces is its built-in Docker support. You can run Docker commands without having Docker Desktop installed locally:
- To start containers defined in a Docker Compose file, run:
1
docker-compose up
- For specific compose files, specify the file:
1
docker-compose -f 'docker-compose.nginx.yml' up
First-time tip: Codespaces comes with Git pre-configured. You can commit and push changes directly from the Source Control tab without additional setup.
4. Managing Ports and Accessing Your Application
When you run applications in Codespaces, they need to be accessible through your browser. GitHub Codespaces handles this automatically through port forwarding:
- Automatic Port Detection: When your application starts (like a web server or API), Codespaces detects the open ports
- Port Forwarding Notification: A popup appears notifying you that a port has been forwarded
- Visibility Options: Ports can be public (anyone with the link can access) or private (only you can access), you can make these changes from the PORTS tab.
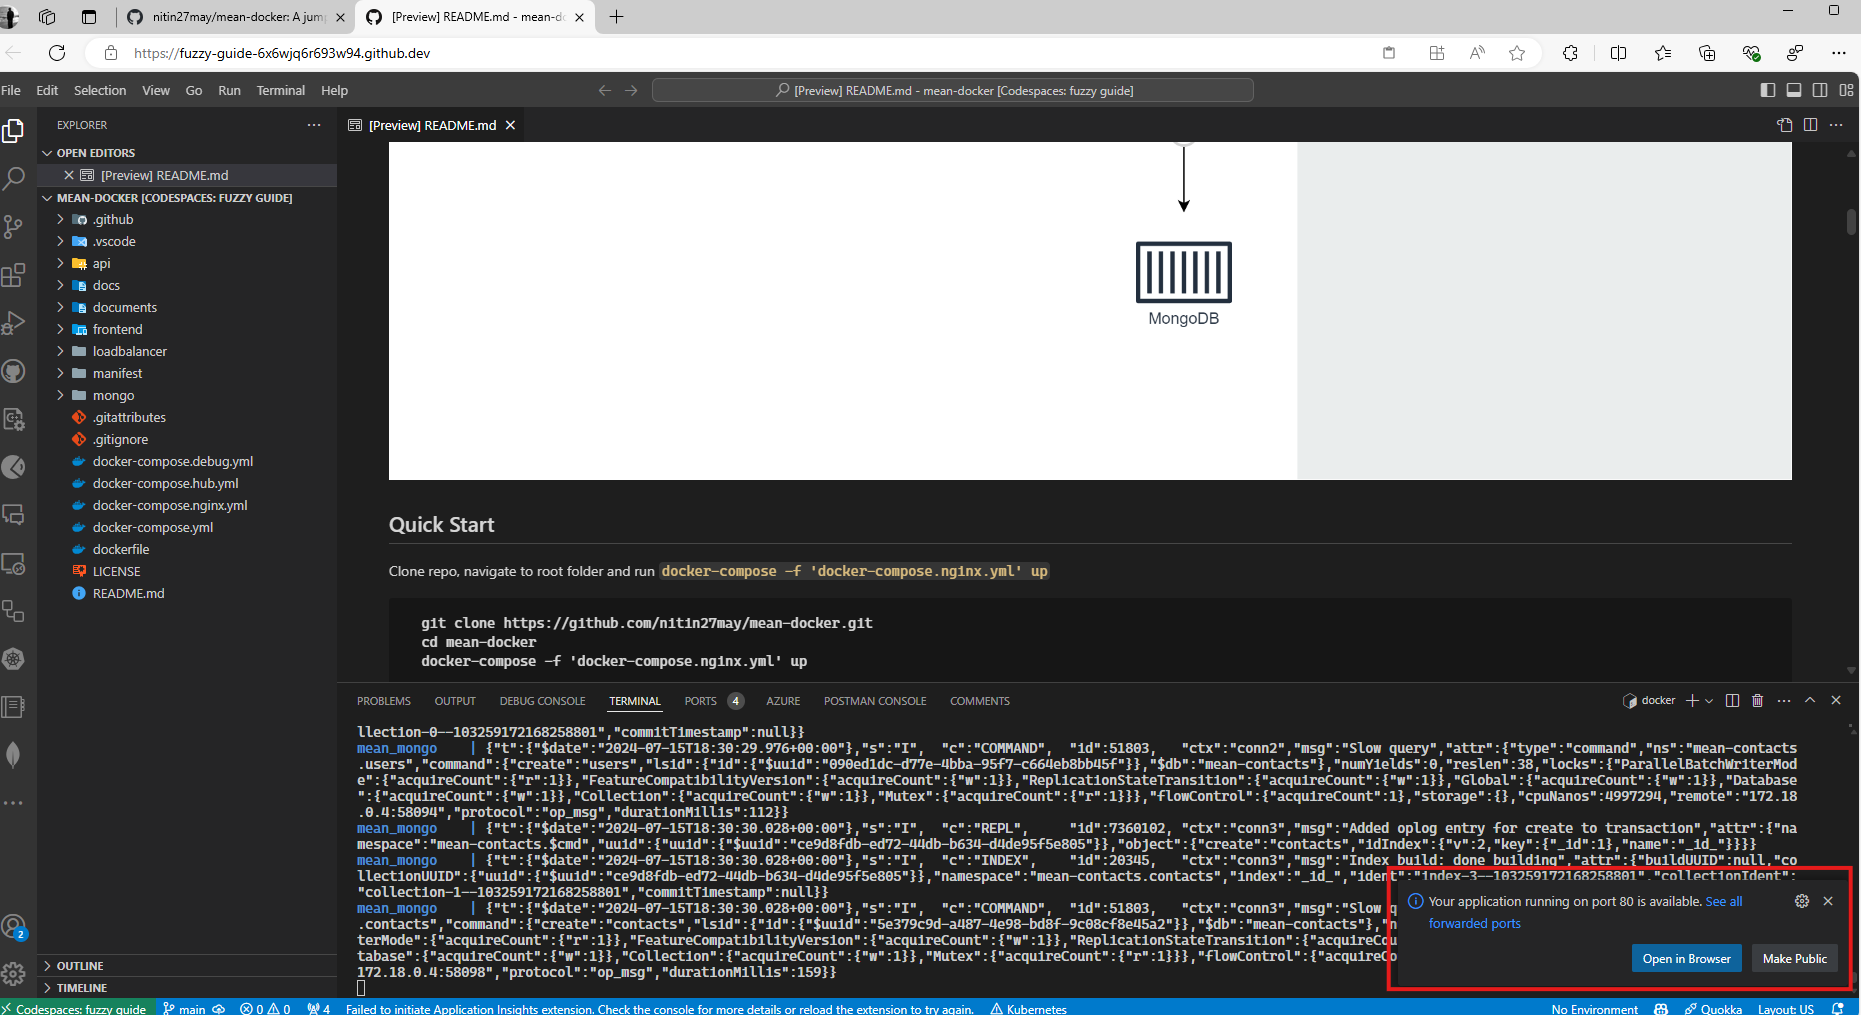
Accessing Your Running Application:
- Click “Open in Browser” from the notification
- Or find the “Ports” tab at the bottom of the screen to see all forwarded ports
- Click the globe icon next to any port to open it in a new browser tab

First-time tip: If your application doesn’t appear automatically, check if you need to manually forward a port. Go to the Ports tab, click “Add Port” and enter your application’s port number (e.g., 3000 for many Node.js apps, 8000 for many Python apps).
5. Advantages of Using GitHub Codespaces
Consistency Across Development Environments: Codespaces ensures that all developers on your team work within a consistent development environment, minimizing the notorious “it works on my machine” issue.
Access Anywhere: Being cloud-based, Codespaces allows you to access your development environment from any device with an internet connection.
Resource Management: Allocate resources as needed, scaling up or down based on your project’s demands.
Customizing Your Codespace with DevContainers
One of GitHub Codespaces’ most powerful features is its integration with DevContainers. These allow you to define your entire development environment as code, ensuring consistency across all team members.
What are DevContainers?
DevContainers are Docker containers specifically configured for development purposes. They provide:
- A consistent development environment for all team members
- Pre-installed tools, runtimes, and dependencies
- Custom VS Code extensions automatically installed
- Standardized workspace configurations
Setting Up a DevContainer
- Create configuration files: Add a
.devcontainerfolder to your repository with:devcontainer.json: Defines the container configuration and VS Code settingsDockerfile: Custom image definition (optional)
- Basic
devcontainer.jsonexample:
1
2
3
4
5
6
7
8
9
10
11
12
13
14
15
16
17
{
  "name": "My Project Dev Environment",
  "image": "mcr.microsoft.com/devcontainers/javascript-node:0-18",
  "customizations": {
    "vscode": {
      "extensions": [
        "dbaeumer.vscode-eslint",
        "esbenp.prettier-vscode"
      ],
      "settings": {
        "editor.formatOnSave": true
      }
    }
  },
  "forwardPorts": [3000, 5000],
  "postCreateCommand": "npm install"
}
This example:
- Uses a Node.js base image
- Installs ESLint and Prettier extensions
- Enables format on save
- Forwards ports 3000 and 5000
- Runs
npm installwhen the container is created
First-time tip: Start with a template! GitHub provides predefined DevContainer templates for various tech stacks.
Troubleshooting and Best Practices for First-Time Users
Common Issues and Solutions
1. Codespace is slow to start or respond
- Try using a more powerful machine type (see Settings → Machine type)
- Close browser tabs you’re not using to free up local resources
- Check your internet connection, as Codespaces requires a stable connection
2. Port forwarding isn’t working
- Ensure your application is actually binding to the correct interface (
0.0.0.0notlocalhost) - Try manually adding the port in the Ports panel
- Check if a firewall or corporate network is blocking connections
3. Git authentication problems
- Codespaces handles GitHub authentication automatically
- For other Git providers, add SSH keys through the terminal or use credential helpers
4. Docker container issues
- Check container logs with
docker logs [container_name] - Ensure your Dockerfile or docker-compose file is formatted correctly
- Be aware of file permission differences between Windows and Linux
Best Practices
1. Use dotfiles for personalization
- Create a dotfiles repository to customize your environment automatically
- GitHub will apply your dotfiles to every new Codespace you create
- Learn more: Personalizing Codespaces with dotfiles
2. Set up environment variables securely
- Use GitHub repository secrets for sensitive information
- Access them in Codespaces using the
secretscontext - Never hardcode credentials in your repository
3. Optimize for cost and performance
- Remember that Codespaces usage consumes GitHub account quotas or incurs charges
- Set automatic shutdown times when you’re not working (default is 30 minutes)
- Choose the appropriate machine type for your workload
4. Leverage pre-builds for faster startup
- For frequent use, set up pre-built containers in repository settings
- This significantly reduces startup time for large projects
Special Tips for Teams
1. Standardize your development environment
- Use DevContainers to ensure all team members work in identical environments
- Document any manual steps needed after codespace creation
- Create onboarding guides specifically for team members using Codespaces
2. Share running applications
- Make ports public to share with teammates for review
- Use the “Share” option in the Ports tab to generate a URL others can access
Real-World Use Cases for GitHub Codespaces
GitHub Codespaces excels in several scenarios:
1. Onboarding new developers
- New team members can start coding within minutes
- No need to spend days setting up local development environments
- Identical setup guarantees they’ll see the same behavior as everyone else
2. Short-term contributions
- Perfect for quick bug fixes or small features
- No need to set up a full development environment for minor changes
- Great for open-source contributions
3. Teaching and workshops
- Instructors can prepare environments in advance
- Students don’t need powerful machines to participate
- Everyone starts with exactly the same setup, reducing support issues
4. Cross-platform development
- Work on projects targeting Linux even from Windows or macOS
- Test in different environments without dual-booting or VMs
- Compile and run natively on the target platform
Conclusion
GitHub Codespaces represents a significant evolution in development workflows by eliminating environment setup challenges and providing consistent, powerful development environments accessible from anywhere. By moving development to the cloud, Codespaces reduces the friction between writing code and seeing it run, allowing developers to focus on what truly matters: building great software.
For first-time users, the initial learning curve of GitHub Codespaces is minimal compared to the benefits it provides. The familiar VS Code interface combined with the power of cloud computing creates an experience that feels local but offers much more flexibility and consistency.
Whether you’re a solo developer working across multiple devices, a team lead trying to standardize development environments, or an open-source contributor looking to quickly jump into a project, GitHub Codespaces offers a streamlined solution that can significantly improve your productivity and collaboration.
Additional Resources for First-Time Users
- GitHub Codespaces Documentation - Official documentation covering all aspects of Codespaces
- VS Code Remote Development - Microsoft’s guide to using VS Code with Codespaces
- DevContainer Reference - Complete reference for devcontainer.json configuration
- GitHub Codespaces Templates - Ready-to-use templates for various development scenarios
- Codespaces Billing Information - Understanding usage limits and billing
Get Involved
- Share Your Experience: Have you used GitHub Codespaces in your workflow? Share your tips and experiences in the comments below!
- Follow Us: Stay updated by following us on GitHub.
- Try It Today: Start with a simple project and experience the benefits of cloud-based development for yourself.
Remember that GitHub continues to evolve Codespaces with new features and improvements, so keep an eye on their release notes for the latest capabilities.