Efficient File Management on Azure Blob Storage: CRUD Operations and Upload Strategies

TL;DR
This article provides a comprehensive guide to efficient file management with Azure Blob Storage using .NET and Angular. We cover four upload strategies:
- Standard File Upload: Simple form-based uploads best for small files
- Chunk-Based Upload: Divides files into smaller segments for better memory management
- Stream Upload: Most memory-efficient approach for any file size
- SAS Upload: Direct browser-to-Azure uploads that bypass your server
Each method has different memory usage, scalability, and implementation complexity characteristics. The article includes practical code examples and implementation guidance.
Introduction
Azure Blob Storage is a scalable, secure, and cost-effective solution for storing unstructured data such as images, videos, and documents. Efficiently managing files—including creating, reading, updating, and deleting (CRUD) operations—is crucial for building robust cloud-based applications.
In this article, we’ll dive into upload strategies such as standard file uploads, chunked uploads, streaming, and direct uploads with SAS tokens. By the end, you’ll have the tools to optimize performance, minimize memory usage, and handle file management with confidence.
1. Understanding the Concept
What It Is
Azure Blob Storage is a Microsoft-managed service designed to store large amounts of unstructured data in the cloud. It offers three types of blobs:
Block blobs: For storing text and binary data.
Append blobs: Optimized for append operations, such as logging.
Page blobs: For random read/write operations, often used in virtual disks.
Why It Matters
Efficient file management on Azure Blob Storage is essential for applications requiring high availability, durability, and scalability. This includes scenarios like:
Serving media files in a content delivery network (CDN).
Backing up and archiving critical data.
Storing and processing large datasets for analytics.
Real-World Use Cases
Azure Blob Storage is a scalable, secure, and cost-effective solution for storing unstructured data. Its use cases include hosting static website assets, media streaming, IoT data archiving, e-commerce content management, and healthcare imaging. It supports backups, disaster recovery, and big data workflows, such as analytics and machine learning. Azure Blob is ideal for storing enterprise documents, geospatial data, gaming assets, and regulatory archives. Its versatility extends to scientific research, education, and software development. With features like global redundancy and robust security, it serves industries like retail, logistics, and AI applications effectively.
2. Step-by-Step Implementation
2.1. Prerequisites
Tools and Frameworks
Azure account with a Blob Storage resource.
Azure Storage SDK for your programming language (e.g., .NET, Python).
Development environment (e.g., Visual Studio, VS Code).
Basic knowledge of REST APIs and cloud storage.
Setup Instructions
Create an Azure Blob Storage account via the Azure Portal.
Install the Azure Storage SDK for your programming language:
dotnet add package Azure.Storage.BlobsRetrieve your storage account connection string from the Azure Portal.
2.2. Code Walkthrough
Establishing a Connection
1
2
3
4
5
6
7
    private readonly BlobServiceClient _blobServiceClient;

    public BlobStorageService(IConfiguration configuration)
    {
        var connectionString = configuration.GetConnectionString("AzureStorage");
        _blobServiceClient = new BlobServiceClient(connectionString);
    }
Creating a Container
1
2
      var containerClient = _blobServiceClient.GetBlobContainerClient(containerName);
        await containerClient.CreateIfNotExistsAsync();
2.2.1 Uploading a File: Four Strategic Approaches
Azure Blob Storage offers flexibility in file uploading methods, each with unique advantages. Let’s explore four approaches optimized for different scenarios and file sizes.
2.2.1.1 Standard File Upload (IFormFile)
flowchart LR
    Client([Client Browser])
    API[.NET API Server]
    Azure[(Azure Blob Storage)]

    Client -- "HTTP POST with FormData" --> API
    API -- "Upload via SDK" --> Azure
    API -- "Success Response" --> Client

    classDef client fill:#f9f,stroke:#333,stroke-width:1px;
    classDef api fill:#bbf,stroke:#333,stroke-width:1px;
    classDef azure fill:#bfb,stroke:#333,stroke-width:1px;

    class Client client;
    class API api;
    class Azure azure;
Description:
IFormFile is a high-level abstraction in ASP.NET Core used for handling file uploads via the multipart/form-data encoding.
It provides an in-memory or temporary storage solution for files uploaded in a form.
How It Works:
- The file is uploaded from the client browser to your server using standard form submission
- The entire file is either buffered in memory or saved to a temporary location (e.g., disk) before processing
- Your server then uploads the complete file to Azure Blob Storage
- The framework manages file processing through model binding
Key Features:
- File is accessed via properties like FileName, Length, and OpenReadStream().
- Simple implementation with built-in ASP.NET Core support
- Good for small to medium files with straightforward requirements
Example:
1
2
3
4
5
6
7
8
    [HttpPost("upload")] // POST api/blob/upload
    [Consumes("multipart/form-data")]
    public async Task<IActionResult> UploadBlobAsync([FromForm] BlobUploadRequest request)
    {
        using var stream = request.File.OpenReadStream();
        await _blobStorageService.UploadBlobAsync(request.ContainerName, request.BlobName, stream);
        return Ok();
    }
1
2
3
4
5
6
public class BlobUploadRequest
{
    public string ContainerName { get; set; }
    public string BlobName { get; set; }
    public IFormFile File { get; set; }
}
1
2
3
4
5
6
7
8
9
10
11
12
13
14
    public async Task UploadBlobAsync(string containerName, string blobName, Stream content)
    {
        if (!IsValidContainerName(containerName))
        {
            throw new ArgumentException("Invalid container name.");
        }
        string blobNameWithTimestamp = GenerateBlobNameWithTimestamp(blobName);

        var containerClient = _blobServiceClient.GetBlobContainerClient(containerName);
        await containerClient.CreateIfNotExistsAsync();

        var blobClient = containerClient.GetBlobClient(blobNameWithTimestamp);
        await blobClient.UploadAsync(content, overwrite: true);
    }
Pros:
Ease of Use: Very easy to implement and integrates well with form submissions.
Validation: Supports model validation (e.g., checking file size or type).
Convenience: Provides metadata like the file name and content type.
Cons:
- Client Memory Usage: High - entire file loaded into browser memory
- Server Memory Usage: High - file is fully loaded into server memory
- Not Suitable for Large Files: Uploading very large files can cause performance issues or out-of-memory exceptions.
Best For:
- Small to medium-sized files (typically under 100MB)
- Simple implementations where ease of use is prioritized
- Applications where server-side processing of the file is needed before storage
2.2.1.2 Chunk-Based Upload
flowchart LR
    Client([Client Browser])
    API[.NET API Server]
    Azure[(Azure Blob Storage)]

    Client -- "Split file into chunks" --> Client
    Client -- "HTTP POST chunk #1" --> API
    API -- "Upload chunk" --> Azure
    Client -- "HTTP POST chunk #2" --> API
    API -- "Upload chunk" --> Azure
    Client -- "HTTP POST final chunk" --> API
    API -- "Upload chunk" --> Azure
    API -- "Combine chunks" --> Azure
    API -- "Success Response" --> Client

    classDef client fill:#f9f,stroke:#333,stroke-width:1px;
    classDef api fill:#bbf,stroke:#333,stroke-width:1px;
    classDef azure fill:#bfb,stroke:#333,stroke-width:1px;

    class Client client;
    class API api;
    class Azure azure;
Description:
Chunked uploads break a large file into smaller parts (chunks) and upload them sequentially.
Each chunk is processed independently and combined later at the destination.
How It Works:
- A client splits the file into chunks of a specified size (typically 5MB)
- Each chunk is sent in a separate HTTP request to your server
- Your server uploads each chunk to Azure Blob Storage
- After all chunks are uploaded, the server instructs Azure to combine them
- The result is a single complete file in Azure Blob Storage
Key Features:
- Better memory management on both client and server
- Improved reliability with ability to retry individual chunks
- Detailed progress tracking
- Possibility for resumable uploads
Example:
1
2
3
4
5
6
7
8
9
10
11
12
13
14
15
16
17
18
19
20
21
22
23
24
25
26
[HttpPost("upload-chunk")]
 public async Task<IActionResult> UploadChunk(
        [FromForm] IFormFile chunk,
        [FromForm] string containerName,
        [FromForm] string blobName,
        [FromForm] int chunkIndex,
        [FromForm] int totalChunks)
    {
        if (chunk == null || chunk.Length == 0)
        {
            return BadRequest(new { Message = "Chunk is missing or empty." });
        }

        try
        {
            // Stream the chunk to the service
            using var stream = chunk.OpenReadStream();
            await _blobStorageService.UploadChunkAsync(containerName, blobName, stream, chunkIndex, totalChunks);

            return Ok(new { Message = $"Chunk {chunkIndex + 1}/{totalChunks} uploaded successfully." });
        }
        catch (Exception ex)
        {
            return StatusCode(500, new { Message = "Error uploading chunk.", Error = ex.Message });
        }
}
1
2
3
4
5
6
7
8
9
10
11
12
13
14
15
16
17
18
19
20
21
22
23
24
25
26
27
28
29
30
31
32
    public async Task UploadChunkAsync(string containerName, string blobName, Stream chunkData, int chunkIndex, int totalChunks)
    {
        if (!IsValidContainerName(containerName))
        {
            throw new ArgumentException("Invalid container name.");
        }

        // Get the container client
        var containerClient = _blobServiceClient.GetBlobContainerClient(containerName);
        await containerClient.CreateIfNotExistsAsync();

        // Get the block blob client
        var blockBlobClient = containerClient.GetBlockBlobClient(blobName);

        // Generate a unique block ID for each chunk
        var blockId = Convert.ToBase64String(Encoding.UTF8.GetBytes(chunkIndex.ToString("d6")));

        // Stage the chunk as a block
        await blockBlobClient.StageBlockAsync(blockId, chunkData);

        // If this is the last chunk, commit the block list
        if (chunkIndex + 1 == totalChunks)
        {
            // Create a list of block IDs
            var blockList = Enumerable.Range(0, totalChunks)
                .Select(index => Convert.ToBase64String(Encoding.UTF8.GetBytes(index.ToString("d6"))))
                .ToList();

            // Commit the block list to assemble the final blob
            await blockBlobClient.CommitBlockListAsync(blockList);
        }
    }
Pros:
Scalability: Allows uploading very large files without overwhelming server resources.
Fault Tolerance: If a chunk fails to upload, only that chunk needs to be retried.
Memory Efficiency: Much better memory management since only one chunk is in memory at a time
Detailed Progress: Enables accurate progress tracking as each chunk completes
Cons:
Complexity: Requires additional logic to manage chunk creation, upload, and reassembly
Metadata Overhead: Involves sending metadata (e.g., file ID, chunk index) with each chunk
Best For:
- Medium to large files (100MB to several GB)
- Applications requiring detailed progress tracking
- Environments with potentially unstable network connections
- Scenarios where memory usage must be carefully managed
2.2.1.3 Stream Upload
flowchart LR
    Client([Client Browser])
    API[.NET API Server]
    Azure[(Azure Blob Storage)]

    Client -- "Initialize file stream" --> Client
    Client -- "HTTP POST stream data" --> API
    API -- "Stream to Azure" --> Azure
    API -- "Success Response" --> Client

    classDef client fill:#f9f,stroke:#333,stroke-width:1px;
    classDef api fill:#bbf,stroke:#333,stroke-width:1px;
    classDef azure fill:#bfb,stroke:#333,stroke-width:1px;

    class Client client;
    class API api;
    class Azure azure;
Description:
Stream Upload is an efficient way to upload files by streaming the data directly to Azure Blob Storage.
It is ideal for large files or when you want to minimize memory usage on the client and server.
How It Works:
- The client browser initializes a file stream
- Data is sent to your server in small chunks (handled automatically)
- Your server immediately forwards each piece of data to Azure as it arrives
- Neither client nor server ever loads the entire file into memory
- The file is essentially “piped” from browser to Azure through your server
Key Features:
Direct Streaming: Access file content directly from the request body as a stream.
Memory Efficiency: Exceptionally memory-efficient for both client and server
Modern Browser Support: Uses modern browser APIs for streaming
Example:
Controller:
1
2
3
4
5
6
7
8
9
10
11
12
13
14
15
16
17
18
19
20
21
22
23
24
25
26
27
    [HttpPost("stream-upload")]
    public async Task<IActionResult> StreamUploadAsync()
    {
        try
        {
            var containerName = Request.Headers["Container-Name"].ToString();
            var blobName = Request.Headers["Blob-Name"].ToString();

            if (string.IsNullOrEmpty(containerName) || string.IsNullOrEmpty(blobName))
            {
                return BadRequest(new { Message = "Container-Name and Blob-Name headers are required." });
            }

            // Stream data from the client directly to Azure Blob Storage
            using var stream = Request.Body;

            // Infer the Content-Type

            await _blobStorageService.UploadBlobAsync(containerName, blobName, stream);

            return Ok(new { Message = "File uploaded successfully." });
        }
        catch (Exception ex)
        {
            return StatusCode(500, new { Message = "Error uploading file.", Error = ex.Message });
        }
    }
Service:
1
2
3
4
5
6
7
8
9
10
11
12
13
14
    public async Task UploadBlobAsync(string containerName, string blobName, Stream content)
    {
        if (!IsValidContainerName(containerName))
        {
            throw new ArgumentException("Invalid container name.");
        }
        string blobNameWithTimestamp = GenerateBlobNameWithTimestamp(blobName);

        var containerClient = _blobServiceClient.GetBlobContainerClient(containerName);
        await containerClient.CreateIfNotExistsAsync();

        var blobClient = containerClient.GetBlobClient(blobNameWithTimestamp);
        await blobClient.UploadAsync(content, overwrite: true);
    }
Explanation
- Headers for Metadata:
- The
Container-NameandBlob-Nameheaders allow you to specify the storage location and file name. These must be passed explicitly as streaming does not include metadata by default.
- The
- Streaming Upload:
- The file is streamed directly from
Request.Bodyto the blob storage, avoiding intermediate buffering and reducing memory usage.
- The file is streamed directly from
- Custom Blob Names:
- A timestamp can be appended to the blob name using
GenerateBlobNameWithTimestampto ensure uniqueness and prevent overwriting files unintentionally.
- A timestamp can be appended to the blob name using
Pros:
Memory Efficiency: Extremely memory-efficient since the file is never fully loaded into memory.
Direct Processing: Allows streaming directly to storage or a processing pipeline.
Scalability: Handles very large files without performance degradation.
Cons:
No Metadata by Default: File metadata (e.g., name, type) must be passed separately (e.g., via headers or query parameters).
Limited Progress Tracking: More difficult to provide detailed progress updates
Browser Support: Requires modern browsers with good streaming support
Best For:
- Uploading very large files of any size
- Applications where memory efficiency is critical
- Modern web applications with up-to-date browser support
2.2.1.4 Large File Upload with SAS (Direct Upload)
flowchart LR
    subgraph Client["Client Browser"]
        File[File]
        XMLReq[XMLHttpRequest]
    end

    subgraph Server["NET API Server"]
        BlobAPI[Blob Storage API]
    end

    Azure[(Azure Blob Storage)]

    File -- "Selected for upload" --> XMLReq
    Client -- "Request SAS URL" --> Server
    Server -- "Generate SAS URL" --> Server
    Server -- "Return SAS URL" --> Client
    XMLReq -- "Direct upload with progress tracking" --> Azure
    Azure -- "Upload confirmation" --> Client

    classDef client fill:#f9f,stroke:#333,stroke-width:1px;
    classDef server fill:#bbf,stroke:#333,stroke-width:1px;
    classDef azure fill:#bfb,stroke:#333,stroke-width:1px;

    class Client client;
    class Server server;
    class Azure azure;
Detailed SAS Upload Process (Large Files)
sequenceDiagram
    participant Browser as Client Browser
    participant API as .NET API Server
    participant Azure as Azure Blob Storage

    Browser->>API: POST /blob/get-upload-url with file metadata
    Note over API: Generate SAS token with<br/>limited permissions
    API->>Browser: Return SAS URL
    Note over Browser: Prepare XMLHttpRequest<br/>with progress event tracking
    Browser->>Azure: PUT request directly to SAS URL
    Note over Browser,Azure: Upload progress events<br/>trigger UI updates
    Azure->>Browser: Upload confirmation
    Note over Browser: Update UI to show<br/>completed upload

    Note right of Azure: No server resources<br/>used during actual<br/>file transfer
How It Works:
- Client requests a SAS URL from your server
- Server generates a time-limited SAS token with specific permissions
- Server returns the SAS URL to the client
- Client uploads directly to Azure Blob Storage using the SAS URL
- Your server is not involved in the file transfer, only in generating the SAS token
Key Features:
- Server resources are not used during file transfer
- Most scalable solution for very large files
- Detailed progress tracking possible on client-side
- Best security approach for cloud storage
Example:
Controller:
1
2
3
4
5
6
7
8
9
10
11
12
13
14
15
16
17
18
19
20
21
22
[HttpPost("get-upload-url")]
public async Task<IActionResult> GetLargeFileUploadUrl([FromBody] LargeFileUploadRequest request)
{
    try
    {
        // Generate a SAS URL for the client to upload directly to Azure
        var sasDetails = await _blobStorageService.GetBlobSasUriAsync(
            request.ContainerName,
            request.BlobName,
            DateTimeOffset.UtcNow.AddHours(1));

        return Ok(new LargeFileUploadResponse
        {
            SasUri = sasDetails.SasUri,
            Expiry = sasDetails.Expiry
        });
    }
    catch (Exception ex)
    {
        return StatusCode(500, new { Message = "Error generating upload URL.", Error = ex.Message });
    }
}
Service:
1
2
3
4
5
6
7
8
9
10
11
12
13
14
15
16
17
18
19
20
21
22
23
24
25
26
27
28
public async Task<BlobSasDetails> GetBlobSasUriAsync(string containerName, string blobName, DateTimeOffset expiryTime)
{
    var containerClient = _blobServiceClient.GetBlobContainerClient(containerName);
    await containerClient.CreateIfNotExistsAsync();

    var blobClient = containerClient.GetBlobClient(blobName);

    // Create SAS token with write permission
    var sasBuilder = new BlobSasBuilder
    {
        BlobContainerName = containerName,
        BlobName = blobName,
        Resource = "b",
        ExpiresOn = expiryTime
    };

    sasBuilder.SetPermissions(BlobSasPermissions.Write | BlobSasPermissions.Create);

    var sasToken = sasBuilder.ToSasQueryParameters(
        new StorageSharedKeyCredential(_blobServiceClient.AccountName,
        GetAccountKeyFromConnectionString())).ToString();

    return new BlobSasDetails
    {
        SasUri = blobClient.Uri + "?" + sasToken,
        Expiry = expiryTime
    };
}
Client-Side Implementation:
1
2
3
4
5
6
7
8
9
10
11
12
13
14
15
16
17
18
19
20
21
22
23
24
25
26
27
28
29
30
31
32
async uploadWithSAS(file: File): Promise<void> {
  // Step 1: Request SAS URL from your server
  const response = await this.http.post<SasResponse>('/api/blob/get-upload-url', {
    containerName: 'uploads',
    blobName: file.name
  }).toPromise();

  // Step 2: Upload directly to Azure using the SAS URL
  return new Promise((resolve, reject) => {
    const xhr = new XMLHttpRequest();
    xhr.open('PUT', response.sasUri, true);
    xhr.setRequestHeader('x-ms-blob-type', 'BlockBlob');
    xhr.setRequestHeader('Content-Type', file.type);

    // Track progress
    xhr.upload.onprogress = (e) => {
      const percentComplete = Math.round((e.loaded / e.total) * 100);
      this.uploadProgress.next(percentComplete);
    };

    xhr.onload = () => {
      if (xhr.status === 201) {
        resolve();
      } else {
        reject(`Upload failed: ${xhr.status}`);
      }
    };

    xhr.onerror = () => reject('Upload failed due to network error');
    xhr.send(file);
  });
}
Pros:
- Server Efficiency: Minimal server resource usage since your server doesn’t handle the file data
- Scalability: Extremely scalable - upload large files without affecting your server
- Direct Communication: Creates direct line between client and Azure Storage
- Progress Tracking: Detailed client-side progress tracking
Cons:
- Security Considerations: Requires careful management of SAS tokens and permissions
- Complexity: More complex client-side implementation
- Less Control: Server has less control over the upload process
Best For:
- Very large files in production environments
- Applications with high scalability requirements
- Scenarios where server resource conservation is critical
Comprehensive Comparison
Upload Methods Comparison
| Feature | Standard Upload | Chunked Upload | Stream Upload | SAS Upload |
|---|---|---|---|---|
| Client Memory | High | Medium | Very Low | Medium |
| Server Memory | High | Minimal | Low | Minimal |
| Implementation Complexity | Low | Medium | Medium | High |
| Direct Upload to Azure | No | No | No | Yes |
| Progress Tracking | Simple | Detailed | Limited | Detailed |
| Resumable Uploads | No | Possible | No | No |
| File Size Suitability | Small (<100MB) | Medium to Large | Any Size | Very Large |
| Scalability | Low | Medium | High | Very High |
| Browser Compatibility | All Browsers | All Browsers | Modern Browsers | All Browsers |
| Server Processing | Yes | Yes | Yes | No (token generation only) |
Implementation Details
| Method | Client-Side Technology | Server-Side Technology | When to Choose |
|---|---|---|---|
| Standard Upload | Form data | IFormFile + BlobClient | Simple requirements, small files |
| Chunked Upload | JavaScript to split file | BlockBlobClient with stages | Large files with reliable progress tracking |
| Stream Upload | Fetch API with streaming | Request.Body direct streaming | Memory efficiency is critical |
| SAS Upload | XMLHttpRequest/fetch with PUT | SAS token generation only | Maximum scalability for large files |
Memory Usage Patterns
| Upload Type | Client Memory Pattern | Server Memory Pattern | Azure SDK Usage |
|---|---|---|---|
| Standard | Entire file loaded at once | Entire file in memory | Single UploadAsync call |
| Chunked | One chunk at a time | One chunk at a time | StageBlockAsync + CommitBlockListAsync |
| Stream | Small read buffer | Small forward buffer | Streaming UploadAsync |
| SAS | Depends on implementation | Token generation only | No SDK usage for upload |
When to Use Each Strategy
Standard Upload (IFormFile): Use for simple uploads where file size is small to medium (up to 100MB), and you want convenience and ease of use.
Chunked Uploads: Use when uploading large files (100MB to several GB) that need detailed progress tracking, resumability, or fault tolerance.
Stream Upload: Use for memory-efficient handling of files of any size when using modern browsers. Best when memory usage must be minimized.
SAS Upload: Use for maximum scalability with very large files in production environments. Ideal when you want to minimize server resource usage during uploads.
2.2.2 Listing All Files and Retrieving File Content with SAS
2.2.2.1 List All Files from a Container (File URL with SAS Token )
This method retrieves all blobs (files) in a specified Azure Blob Storage container. Optionally, you can filter by a folder path and include a Shared Access Signature (SAS) URI for direct access to the files.
Controller Example:
1
2
3
4
5
6
    [HttpGet("list")] // GET api/blob/list
    public async Task<IActionResult> GetAllBlobsAsync(string containerName, string path = null)
    {
        var blobs = await _blobStorageService.GetAllBlobsAsync(containerName, path, true, DateTimeOffset.UtcNow.AddHours(1));
        return Ok(blobs);
    }
Service Example:
1
2
3
4
5
6
7
8
9
10
11
12
13
14
15
16
17
18
19
20
21
22
23
24
25
    public async Task<List<BlobDetails>> GetAllBlobsAsync(string containerName, string path = null, bool includeSasUri = false, DateTimeOffset? sasExpiryTime = null)
    {
        var containerClient = _blobServiceClient.GetBlobContainerClient(containerName);
        var blobs = containerClient.GetBlobsAsync(prefix: path);
        var blobDetailsList = new List<BlobDetails>();

        await foreach (var blobItem in blobs)
        {
            var blobDetails = new BlobDetails
            {
                Name = blobItem.Name,
                CreatedOn = blobItem.Properties.CreatedOn,
                Metadata = blobItem.Metadata,
            };

            if (includeSasUri && sasExpiryTime.HasValue)
            {
                blobDetails.SasUri = await GetBlobSasUriAsync(containerName, blobItem.Name, sasExpiryTime.Value);
            }

            blobDetailsList.Add(blobDetails);
        }

        return blobDetailsList;
    }
Explanation:
Parameters:
containerName: The name of the Azure Blob Storage container from which blobs are listed.path: Optional folder path for filtering blobs.includeSasUri: Iftrue, includes a SAS token URI for each blob.sasExpiryTime: Specifies how long the SAS token will remain valid.
Behavior:
The method fetches blobs asynchronously using
GetBlobsAsync, which supports efficient streaming of large lists of blobs.Each blob’s details, including its name, creation time, and metadata, are stored in the
BlobDetailsobject.If SAS URIs are requested, the method generates them for secure, time-limited access to the files.
Response Object: The BlobDetails object contains:
Name: The name of the blob.CreatedOn: The creation timestamp of the blob.Metadata: Custom metadata associated with the blob.SasUri(optional): A time-bound URI for direct file access.
Security:
SAS URIs are generated only if explicitly requested via the
includeSasUriparameter.The
sasExpiryTimeensures the SAS token is valid only for a limited duration, reducing potential misuse.
Use Case
File Browsing: Ideal for listing all files in a container or a specific folder, with the option to generate secure links for download or sharing.
Dynamic Access: SAS tokens allow users to access files securely without exposing storage credentials.
Metadata Retrieval: Useful for displaying metadata or auditing file properties.
2.2.2.2 Retrieve File Content (Stream)
To retrieve a blob’s content, you can stream the file directly from Azure Blob Storage to the client:
Controller Example:
1
2
3
4
5
6
7
    [HttpGet("download")] // GET api/blob/download
    public async Task<IActionResult> DownloadBlobAsync(string containerName, string blobName)
    {
        var stream = await _blobStorageService.DownloadBlobAsync(containerName, blobName);
        return File(stream, "application/octet-stream", blobName);
    }
Service Example
1
2
3
4
5
6
7
   public async Task<Stream> DownloadBlobAsync(string containerName, string blobName)
    {
        var containerClient = _blobServiceClient.GetBlobContainerClient(containerName);
        var blobClient = containerClient.GetBlobClient(blobName);
        var downloadInfo = await blobClient.DownloadAsync();
        return downloadInfo.Value.Content;
    }
Explanation:
Stream-Based Retrieval: This approach allows you to stream the file directly to the client without first saving it to the server’s local storage.
Secure Access: The method ensures secure access by leveraging Azure SDK’s built-in authentication mechanisms, such as Managed Identity or connection strings, without exposing storage credentials.
Content-Type Handling:
application/octet-streamis used to indicate a binary file. This can be adjusted based on the file type (e.g.,text/plainfor text files,image/jpegfor images).
Use Case:
Ideal for File Sharing: Suitable for scenarios where files need to be shared or downloaded securely by authorized clients without exposing storage credentials.
Efficient for Large Files: Streaming avoids loading the entire file into memory, making it efficient for large file downloads.
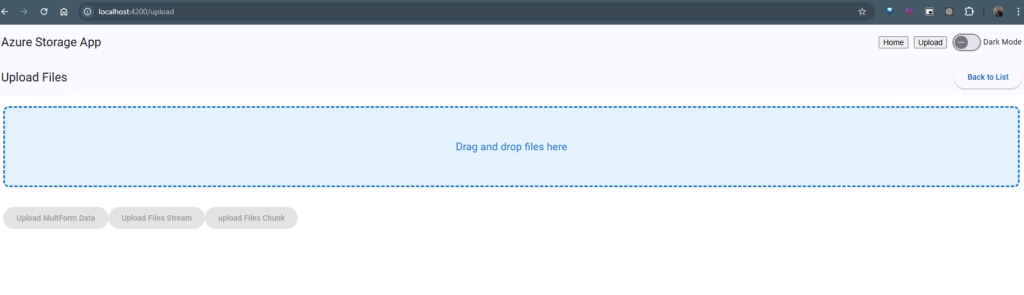
2.2.3 UI Implementation
Let’s build a modern, user-friendly file upload interface in Angular to interact with our backend services for blob uploads. Our interface will support:
- Drag-and-drop file selection
- Multiple upload methods selection
- Detailed progress tracking
- File listing and management
Angular Service for File Uploads
First, let’s create a service that handles the different upload methods:
1
2
3
4
5
6
7
8
9
10
11
12
13
14
15
16
17
18
19
20
21
22
23
24
25
26
27
28
29
30
31
32
33
34
35
36
37
38
39
40
41
42
43
44
45
46
47
48
49
50
51
52
53
54
55
56
57
58
59
60
61
62
63
64
65
66
67
68
69
70
71
72
73
74
75
76
77
78
79
80
81
82
83
84
85
86
87
88
89
90
91
92
93
94
95
96
97
98
99
100
101
102
103
104
105
106
107
108
109
110
111
112
113
114
115
116
117
118
119
120
121
122
123
124
125
126
127
128
129
130
131
132
133
134
135
136
137
138
139
140
141
142
143
144
145
146
147
148
149
150
151
152
153
154
155
156
157
158
159
160
161
162
163
164
// storage.service.ts
import { Injectable } from '@angular/core';
import { HttpClient, HttpEvent, HttpEventType, HttpHeaders, HttpRequest } from '@angular/common/http';
import { Observable, Subject } from 'rxjs';
import { map } from 'rxjs/operators';

@Injectable({
  providedIn: 'root'
})
export class StorageService {
  private apiUrl = '/api/blob';
  private uploadProgress = new Subject<number>();

  uploadProgress$ = this.uploadProgress.asObservable();

  constructor(private http: HttpClient) { }

  // 1. Standard File Upload
  uploadMultipartFormData(file: File, containerName: string): Observable<any> {
    const formData = new FormData();
    formData.append('file', file);
    formData.append('containerName', containerName);
    formData.append('blobName', file.name);

    const req = new HttpRequest('POST', `${this.apiUrl}/upload`, formData, {
      reportProgress: true
    });

    return this.http.request(req).pipe(
      map(event => this.getEventMessage(event, file))
    );
  }

  // 2. Chunked Upload
  uploadFileChunked(file: File, containerName: string, chunkSize: number = 5 * 1024 * 1024): Observable<any> {
    const totalChunks = Math.ceil(file.size / chunkSize);
    let currentChunk = 0;
    const uploadChunk$ = new Subject<any>();

    const processNextChunk = () => {
      if (currentChunk >= totalChunks) {
        uploadChunk$.complete();
        return;
      }

      const start = currentChunk * chunkSize;
      const end = Math.min(file.size, start + chunkSize);
      const chunk = file.slice(start, end);

      const formData = new FormData();
      formData.append('chunk', chunk, 'chunk');
      formData.append('containerName', containerName);
      formData.append('blobName', file.name);
      formData.append('chunkIndex', currentChunk.toString());
      formData.append('totalChunks', totalChunks.toString());

      this.http.post(`${this.apiUrl}/upload-chunk`, formData).subscribe(
        (response) => {
          currentChunk++;
          this.uploadProgress.next(Math.round((currentChunk / totalChunks) * 100));
          uploadChunk$.next({ progress: (currentChunk / totalChunks) * 100 });
          processNextChunk();
        },
        (error) => {
          uploadChunk$.error(error);
        }
      );
    };

    // Start the chunking process
    processNextChunk();
    return uploadChunk$.asObservable();
  }

  // 3. Stream Upload
  uploadFileStream(file: File, containerName: string): Observable<any> {
    const headers = new HttpHeaders({
      'Container-Name': containerName,
      'Blob-Name': file.name
    });

    const req = new HttpRequest('POST', `${this.apiUrl}/stream-upload`, file, {
      headers,
      reportProgress: true
    });

    return this.http.request(req).pipe(
      map(event => this.getEventMessage(event, file))
    );
  }

  // 4. SAS Direct Upload
  uploadLargeFile(file: File, containerName: string): Observable<any> {
    const sasUpload$ = new Subject<any>();

    // Step 1: Get SAS URL from server
    this.http.post<{sasUri: string, expiry: string}>(`${this.apiUrl}/get-upload-url`, {
      containerName,
      blobName: file.name
    }).subscribe(
      (response) => {
        // Step 2: Upload directly to Azure using the SAS URL
        const xhr = new XMLHttpRequest();
        xhr.open('PUT', response.sasUri, true);
        xhr.setRequestHeader('x-ms-blob-type', 'BlockBlob');
        xhr.setRequestHeader('Content-Type', file.type || 'application/octet-stream');

        // Track progress
        xhr.upload.onprogress = (e) => {
          if (e.lengthComputable) {
            const percentComplete = Math.round((e.loaded / e.total) * 100);
            this.uploadProgress.next(percentComplete);
            sasUpload$.next({ progress: percentComplete });
          }
        };

        xhr.onload = () => {
          if (xhr.status === 201) {
            sasUpload$.next({ complete: true });
            sasUpload$.complete();
          } else {
            sasUpload$.error(`Upload failed: ${xhr.status}`);
          }
        };

        xhr.onerror = () => {
          sasUpload$.error('Upload failed due to network error');
        };

        xhr.send(file);
      },
      (error) => {
        sasUpload$.error(error);
      }
    );

    return sasUpload$.asObservable();
  }

  // List files in a container
  listFiles(containerName: string, path: string = null): Observable<any> {
    let url = `${this.apiUrl}/list?containerName=${containerName}`;
    if (path) {
      url += `&path=${path}`;
    }
    return this.http.get(url);
  }

  // Helper method to format upload progress events
  private getEventMessage(event: HttpEvent<any>, file: File) {
    switch (event.type) {
      case HttpEventType.UploadProgress:
        const progress = Math.round(100 * event.loaded / event.total);
        this.uploadProgress.next(progress);
        return { progress };

      case HttpEventType.Response:
        return { complete: true };

      default:
        return { progress: 0 };
    }
  }
}
Upload Component Implementation
Now, let’s create a component that uses our service to provide a user-friendly upload interface:
1
2
3
4
5
6
7
8
9
10
11
12
13
14
15
16
17
18
19
20
21
22
23
24
25
26
27
28
29
30
31
32
33
34
35
36
37
38
39
40
41
42
43
44
45
46
47
48
49
50
51
52
53
54
55
56
57
58
59
60
61
62
63
64
65
66
67
68
69
70
71
72
73
74
75
76
77
78
79
80
81
82
83
84
85
86
87
88
89
90
91
92
93
94
95
96
97
// file-upload.component.ts
import { Component } from '@angular/core';
import { StorageService } from '../storage.service';

@Component({
  selector: 'app-file-upload',
  templateUrl: './file-upload.component.html',
  styleUrls: ['./file-upload.component.scss']
})
export class FileUploadComponent {
  selectedFile: File = null;
  containerName: string = 'uploads';
  uploadProgress: number = 0;
  uploading: boolean = false;
  uploadMethod: string = 'standard';
  dragOver: boolean = false;

  uploadMethods = [
    { value: 'standard', label: 'Standard Upload', description: 'Best for small files' },
    { value: 'chunked', label: 'Chunked Upload', description: 'Better for large files' },
    { value: 'stream', label: 'Stream Upload', description: 'Memory efficient' },
    { value: 'sas', label: 'Direct Upload (SAS)', description: 'Fastest for very large files' }
  ];

  constructor(private storageService: StorageService) {
    this.storageService.uploadProgress$.subscribe(progress => {
      this.uploadProgress = progress;
    });
  }

  onFileSelected(event: any): void {
    if (event.target.files.length > 0) {
      this.selectedFile = event.target.files[0];
    }
  }

  onDrop(event: DragEvent): void {
    event.preventDefault();
    this.dragOver = false;

    if (event.dataTransfer.files.length > 0) {
      this.selectedFile = event.dataTransfer.files[0];
    }
  }

  onDragOver(event: DragEvent): void {
    event.preventDefault();
    this.dragOver = true;
  }

  onDragLeave(event: DragEvent): void {
    event.preventDefault();
    this.dragOver = false;
  }

  uploadFile(): void {
    if (!this.selectedFile) {
      alert('Please select a file first');
      return;
    }

    this.uploading = true;
    this.uploadProgress = 0;
    let upload$: Observable<any>;

    switch (this.uploadMethod) {
      case 'standard':
        upload$ = this.storageService.uploadMultipartFormData(this.selectedFile, this.containerName);
        break;
      case 'chunked':
        upload$ = this.storageService.uploadFileChunked(this.selectedFile, this.containerName);
        break;
      case 'stream':
        upload$ = this.storageService.uploadFileStream(this.selectedFile, this.containerName);
        break;
      case 'sas':
        upload$ = this.storageService.uploadLargeFile(this.selectedFile, this.containerName);
        break;
      default:
        upload$ = this.storageService.uploadMultipartFormData(this.selectedFile, this.containerName);
    }

    upload$.subscribe(
      (event) => {
        if (event.complete) {
          this.uploading = false;
          this.selectedFile = null;
          // Refresh file list or show success message
        }
      },
      (error) => {
        console.error('Upload error:', error);
        this.uploading = false;
      }
    );
  }
}
HTML Template
1
2
3
4
5
6
7
8
9
10
11
12
13
14
15
16
17
18
19
20
21
22
23
24
25
26
27
28
29
30
31
32
33
34
35
36
37
38
39
40
41
42
43
44
45
46
47
48
49
50
51
52
53
54
55
56
57
58
59
60
61
62
63
64
65
66
67
68
69
70
71
72
73
74
75
76
77
78
79
80
<!-- file-upload.component.html -->
<div class="upload-container">
  <h2>Upload Files to Azure Blob Storage</h2>

  <div
    class="dropzone"
    [class.active]="dragOver"
    [class.disabled]="uploading"
    (dragover)="onDragOver($event)"
    (dragleave)="onDragLeave($event)"
    (drop)="onDrop($event)">

    <div class="dropzone-content">
      <mat-icon>cloud_upload</mat-icon>
      <h3>Drag & Drop Files Here</h3>
      <p>Or click to browse files</p>

      <input
        type="file"
        id="fileInput"
        [disabled]="uploading"
        (change)="onFileSelected($event)"
        style="display: none;">

      <button
        mat-raised-button
        color="primary"
        [disabled]="uploading"
        (click)="fileInput.click()">
        Select File
      </button>
    </div>
  </div>

  <div class="file-info" *ngIf="selectedFile">
    <h3>Selected File</h3>
    <p>
      <strong>Name:</strong> <br>
      <strong>Size:</strong> <br>
      <strong>Type:</strong>
    </p>
  </div>

  <div class="upload-options">
    <h3>Upload Method</h3>
    <mat-radio-group [(ngModel)]="uploadMethod" [disabled]="uploading">
      <mat-radio-button
        *ngFor="let method of uploadMethods"
        [value]="method.value"
        class="upload-method-option">
        <strong></strong>
        <small></small>
      </mat-radio-button>
    </mat-radio-group>
  </div>

  <mat-form-field appearance="outline" class="container-input">
    <mat-label>Container Name</mat-label>
    <input matInput [(ngModel)]="containerName" [disabled]="uploading">
  </mat-form-field>

  <div class="upload-progress" *ngIf="uploading">
    <mat-progress-bar
      mode="determinate"
      [value]="uploadProgress">
    </mat-progress-bar>
    <p>% Uploaded</p>
  </div>

  <div class="action-buttons">
    <button
      mat-raised-button
      color="primary"
      [disabled]="!selectedFile || uploading"
      (click)="uploadFile()">
      <mat-icon>cloud_upload</mat-icon>
      Upload File
    </button>
  </div>
</div>
SCSS Styling
1
2
3
4
5
6
7
8
9
10
11
12
13
14
15
16
17
18
19
20
21
22
23
24
25
26
27
28
29
30
31
32
33
34
35
36
37
38
39
40
41
42
43
44
45
46
47
48
49
50
51
52
53
54
55
56
57
58
59
60
61
62
63
64
65
66
67
68
69
70
71
72
73
74
75
76
77
78
79
80
81
82
83
84
// file-upload.component.scss
.upload-container {
  max-width: 800px;
  margin: 0 auto;
  padding: 20px;
}

.dropzone {
  border: 2px dashed #ccc;
  border-radius: 5px;
  padding: 30px;
  text-align: center;
  margin-bottom: 20px;
  transition: all 0.3s ease;

  &.active {
    border-color: #3f51b5;
    background-color: rgba(63, 81, 181, 0.05);
  }

  &.disabled {
    opacity: 0.7;
    cursor: not-allowed;
  }
}

.dropzone-content {
  mat-icon {
    font-size: 48px;
    width: 48px;
    height: 48px;
    color: #3f51b5;
  }

  h3 {
    margin: 10px 0;
  }
}

.file-info, .upload-options {
  background-color: #f5f5f5;
  padding: 15px;
  border-radius: 5px;
  margin-bottom: 20px;
}

.upload-method-option {
  display: block;
  margin-bottom: 10px;

  small {
    display: block;
    color: #666;
    margin-left: 24px;
  }
}

.container-input {
  width: 100%;
  margin-bottom: 20px;
}

.upload-progress {
  margin-bottom: 20px;

  p {
    text-align: center;
    margin-top: 5px;
    font-weight: bold;
  }
}

.action-buttons {
  display: flex;
  justify-content: flex-end;

  button {
    min-width: 150px;

    mat-icon {
      margin-right: 8px;
    }
  }
}
This Angular implementation provides a professional, user-friendly interface for uploading files to Azure Blob Storage. It includes:
- A drag-and-drop zone for intuitive file selection
- Clear radio button options for selecting the upload method
- Container name specification
- Real-time progress tracking
- Responsive design with Material components
The implementation is complete with error handling and visual feedback, making it ready for production use.
Conclusion
In this article, we’ve explored comprehensive approaches to file management with Azure Blob Storage. By implementing the appropriate upload strategy—whether standard, chunked, streamed, or direct with SAS tokens—you can optimize your application’s performance based on your specific requirements.
Each method offers different advantages in terms of memory usage, scalability, and complexity. By understanding these tradeoffs, you can make informed decisions that balance performance with developer experience.
With the code examples and implementation details provided, you now have the tools to build robust, efficient file management solutions for your applications using Azure Blob Storage.
Further Reading
- Azure Blob Storage Documentation
- Azure Storage Client Library for .NET
- SAS Token Security Best Practices
Get Involved!
Try the Code: Test the examples provided and share your results in the comments.
Follow Us: Stay updated on new developments by following the project on. GitHub.
Join the Conversation: What challenges have you faced with File Upload? Share your experiences in the comments below!